 In my previous post I’ve described what is XML, what is it for and what are the particular components. This time I’m going to show you how to properly import almost any XML file into memoQ for translation. I’m going to reference the files described in previous part, so you might want to look there for comparison and file structure description.
The posts are an adaptation of the presentation I gave at the Translation Conference in Warsaw, March 2014.
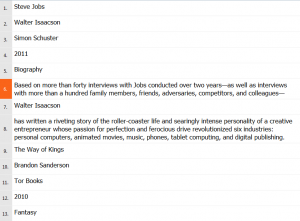
The standard way of adding files into a new project in memoQ is to use Import files command on the second screen of New Project Wizard. However, when creating projects I usually skip that step and I’m adding files to an already created project by simple drag and drop from file explorer (in my case it’s usually Total Commander). When you add files like that, memoQ asks no questions – the default filter settings are being used. In case of our book collection file, the result will look like this:
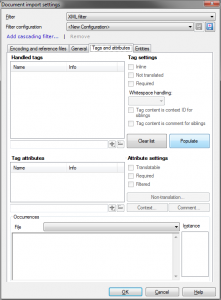
As you can see, text was imported correctly, but formatting tags were treated as external, so text which should be one segment was split into three. How can we fix it? We need to import the file in a bit more complicated way. What we need is Import with options command. Or you can even drag and drop the same file for the second time – this will lead to Document import options dialog being displayed. Click Change filter and configuration command to display Document import settings dialog. Switch to Tags and attributes tab.
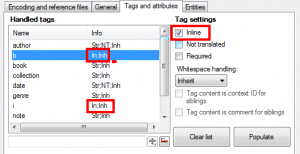
Click Populate button. memoQ will read the tags and attributes from the file and display them in the Handled tags field. It will also try to assign properties to tags, as you can see below:
Tags <b> and <i> are marked as inline. Of course you can mark tags manually too. And since these settings can be useful in the future (especially if you enter any changes), you can save them using this button:
In the displayed dialog enter a name for the filter plus optional description and click OK. The file will be imported and this time <i> tags will be properly treated as inline, so the segment won’t be split, making the translation easier.
Now, let’s take a look at somewhat more complex XML file:
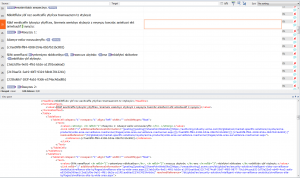
If you drag and drop this file into memoQ, the result won’t be encouraging. By importing this way I’ve got 106 segments for translation – some of them are splitted incorrectly, others should not be translated at all. So you can try to repeat the process in of importing by using Import with options command, changing filter configuration and using Populate command to force memoQ to analyze tags. The result will look like this:
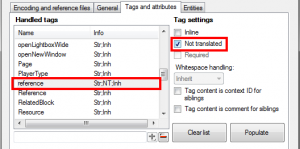
That’s actually not so bad with regard to inline tags – we’ve got 94 segments this time, but there is still some content which should not be imported – particularly strings inside curly braces ({}). What you have to do now is to re-import the file again, but this time manually change settings for some tags. Please note names of the tags the content of which should not be imported. In this case it’s mainly <reference>. So go back to import settings and find the <reference> tag – please note, that there are actually two <reference> tags, written with capital R and small “r” – these are different entities, since XML names are case sensitive. Click the <reference> tag in the Handled tags list, and then select Not translated setting.
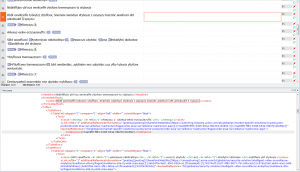
And this is the result of file import:
Now we have only 63 segments for translation, and the skipped content is shown in grey on the preview. If there are other tags with the content you don’t want to import, you just have to mark them as Not translated in the filter configuration and that’s it. Of course it’s a good idea to save the created filter for future use, especially if there are more than one file to be translated.
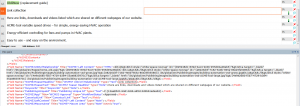
It seems we have the situation under control. Unfortunately, there are even more complex to be found in the world of XML authoring. Take look at this example:
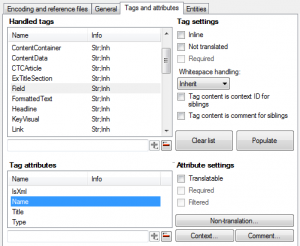
As you can see there’s a <Field> tag with some content obviously not meant for translation. So we can just axe <Field> tags, right? Unfortunately, you can’t. When you look closely you will see that the <Field> contains both text to be ignored and to be translated. They can be separated only by the content of the “Name” attribute. Fortunately XML filters can help you with this problem too. You need to get back to the drawing board, I mean to filter settings.
When you select a tag in Handled tags field you will see it’s available attributes in the Tag attributes area.
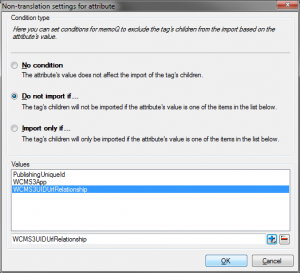
Click the attribute you are interested in to get to its options. There’s an Translatable check box – I’ll come back to it in a minute. For now we are interested in the Non translation button. Click it to display Non-translation settings for attribute dialog. In this case you need to choose not to import these three labels, all the rest will be imported.
And this is the final result. Nice and clean.
Now, there are two more special cases when it comes to translation of tags and attributes.
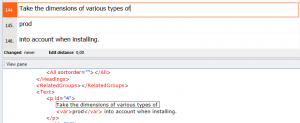
Sometimes we need some more flexibility with regard to tags and their content. See the screenshot below:
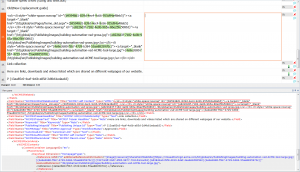
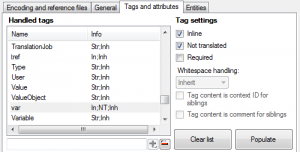
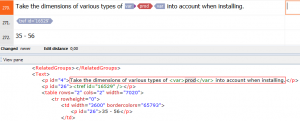
This is a result of default import of an XML file, just drag and drop. Obviously the <var> tags should be treated as inline. There’s an easy fix to that – just mark them as inline. However, the content of var tag is a placeholder for a product name and it definitely should not be translated. We can easily prevent the translation by checking both Inline and Not translated options:
The code will be rendered like this:
The other special case is when we need to translate an attribute. While usually you don’t want to do this, sometimes it’s necessary. Take a look at this example – this is a valid XML in which title and author of a book are stored as attributes of the <book> element. It’s a bad practice, but this happens.
In such case you just need to select the <book> tag on the Handled tags list, then select “title” in the Tag attributes field and check Translatable option for this attribute. The text will be imported for translation.
* * *
As you can see, the process of defining XML filter is not particularly complicated, however it can be time consuming, especially for more complex files, requiring a lot of importing, fiddling and reimporting to check the results. And please remember that this short introduction is not meant to cover all XML import options for memoQ, only the basic options required to create a working filter for simple and somewhat more complex XML files. If you need more information on settings like encoding, XSLT, white space normalization and entities, consult the software help.
Third part of the series will cover defining XML filters for Trados Studio.



4 pings